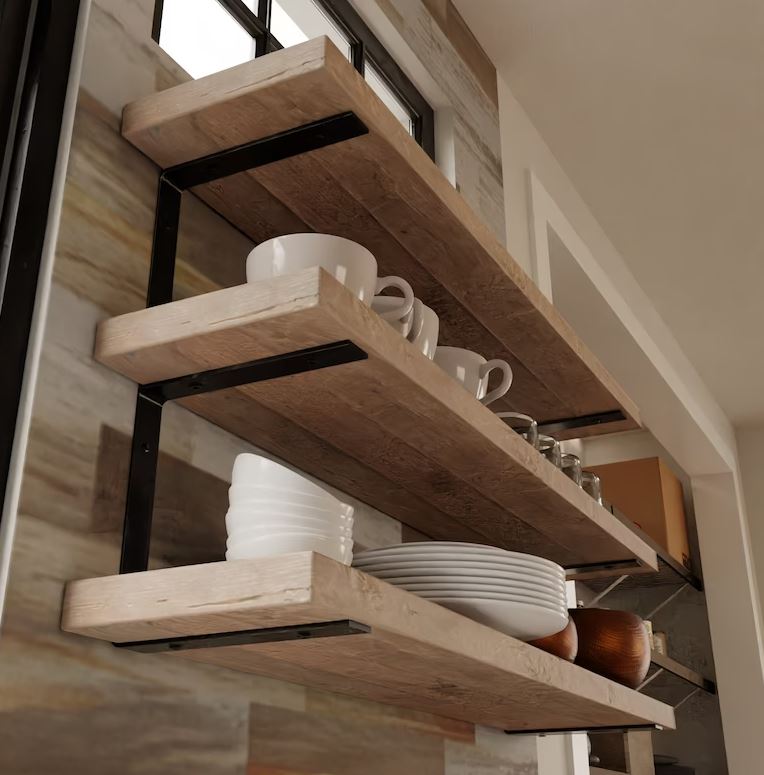
Some people love ’em, some people hate ’em, but the fact remains: open shelves are IN! And believe it or not, if you’re a lover, this is one of the easiest weekend warrior DIY projects around.
Ready to get started?
Supplies You Will Need
- A Wood board(s) – 2×8 or 2×10 makes the best average shelf size
- Stain or paint (up to you!) – any color works
- Shelf brackets
- Drill and bits
- A level
- Painter’s tape
- 80, 120, and 220 grit sandpaper (handheld orbiting sander optional, but will save your arms)
- A Tape Measure
- Wrapping paper
- Scissors

Step 1: Determine the Shelf Length
First and foremost, once you’ve picked out the spot in your home that you want to add open shelves to, measure it and brainstorm what you want the length to look like. This will help you when you go out to invest in your wood board(s). For example, if one board is 120 inches (10 feet), you can purchase that and cut it down into four 30-inch shelves.
Pro Tip: Though you can cut the boards yourself, if you have not done it before or do not feel comfortable, ask the store to cut it for you in the length you want!
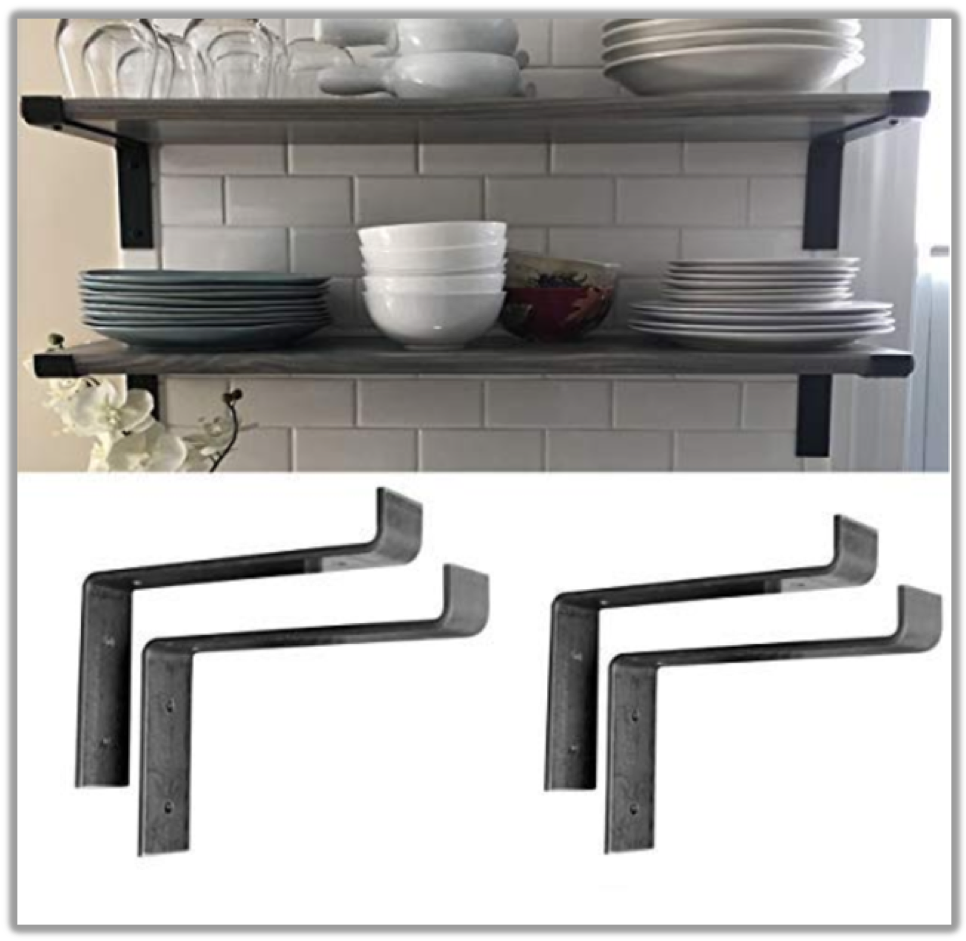
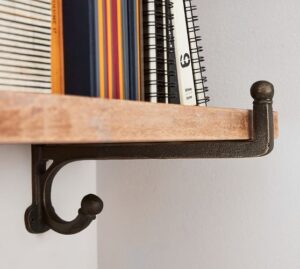
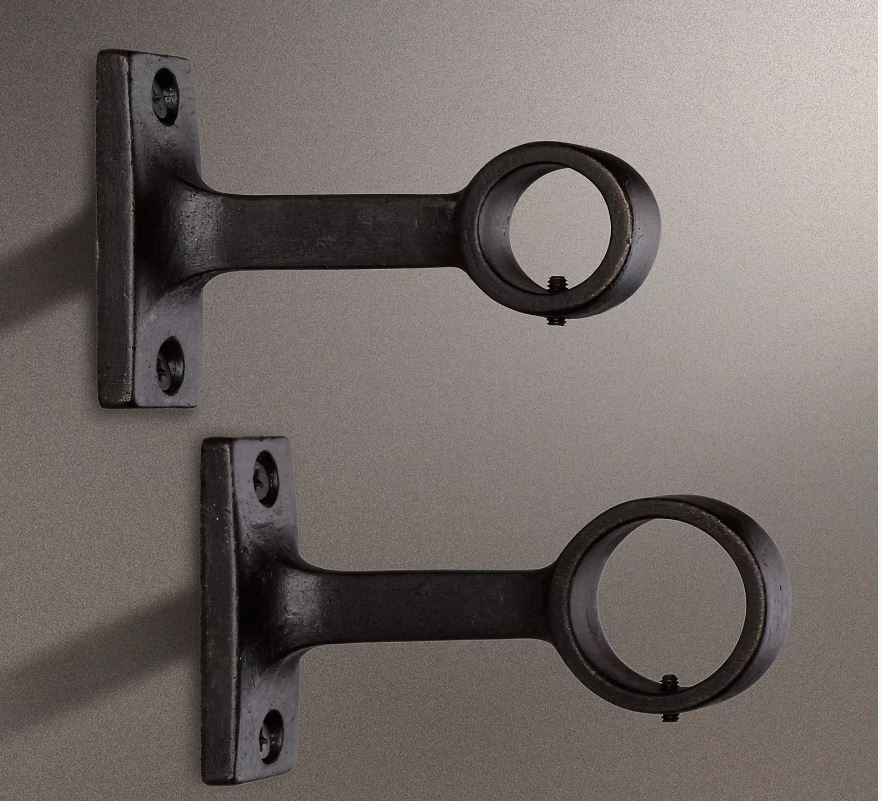
Step 2: Choose Your Brackets
This is the best way to customize your project! You can’t go wrong here; if you have other brackets that you love in the house, you might want to get a similar color or style. You can choose something minimal so the shelves appear to float, or you can pick something big and bold that makes a statement. The opportunities are endless! Here are a couple of my favorite places to find good brackets:
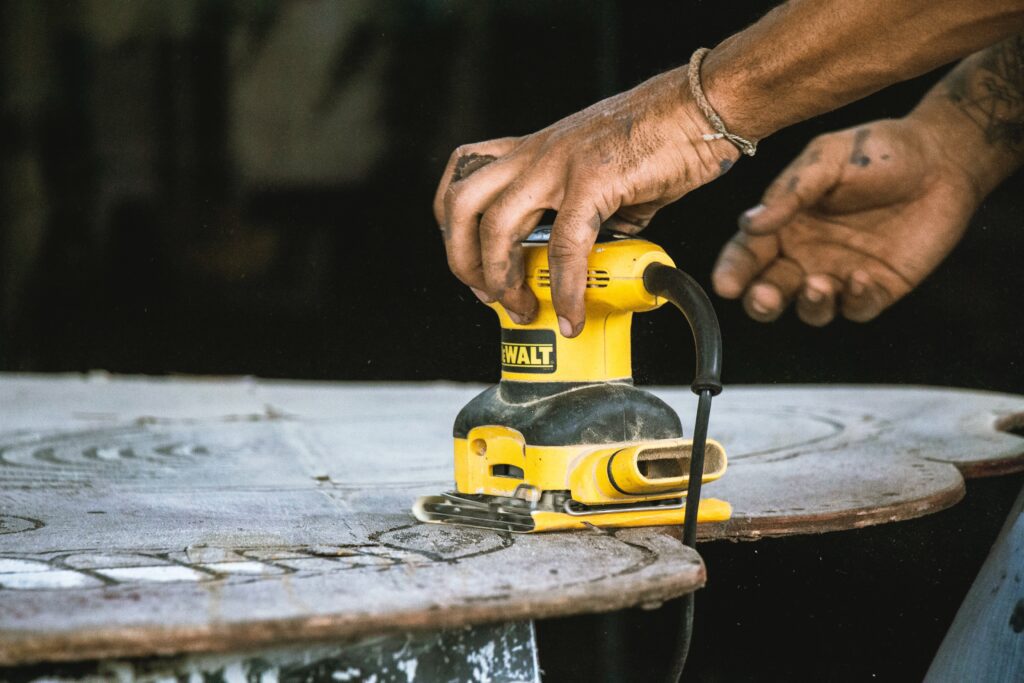
Step 3: Sanding the Boards
Unless you purchase a pre-sanded board, this is a vital step you will not want to overlook. Raw wood boards tend to have rough, fuzzy gained surfaces, especially the ends. To tame those wood fibers and give your shelf a finished look, sand the board, and then sand it again. This process will take some time, but don’t skimp; it’s the single best way to get a professional look. For the ultimate outcome, use a handheld orbiting sander, starting with 80 grit, then 120 grit, and then ending with 220 grit for the baby smooth finale.
Pro Tip: Even the best handheld sander won’t make a crooked board straight. Make sure you choose the straightest board you can find at the store, one without any bows, curves, or warps; or, make good friends with someone who has a planer.

Step 4: Staining or Painting
Once you have your baby-smooth boards, your brackets, and the rest of the materials you need all ready to go, it’s time to stain or paint your boards. There’s no secret on this one; simply brush a thick coat of the stain or paint using a sponge brush and give it some time to soak into the wood. If paint, wait until it dries to flip and do the other side. If stain, wipe off the left-over stain after most of it has penetrated the wood – follow the directions on the can. Throughout the process, be mindful of drips and uneven coating, as it can result in an uneven finish.
Pro Tip: When you paint, consider using a painter’s pyramid to hold it up. An overturned bucket or folding table covered in painter’s plastic also works. Make sure your board is FULLY DRY before flipping it over to do the back side, or you could get rings or wrinkles in your finish!
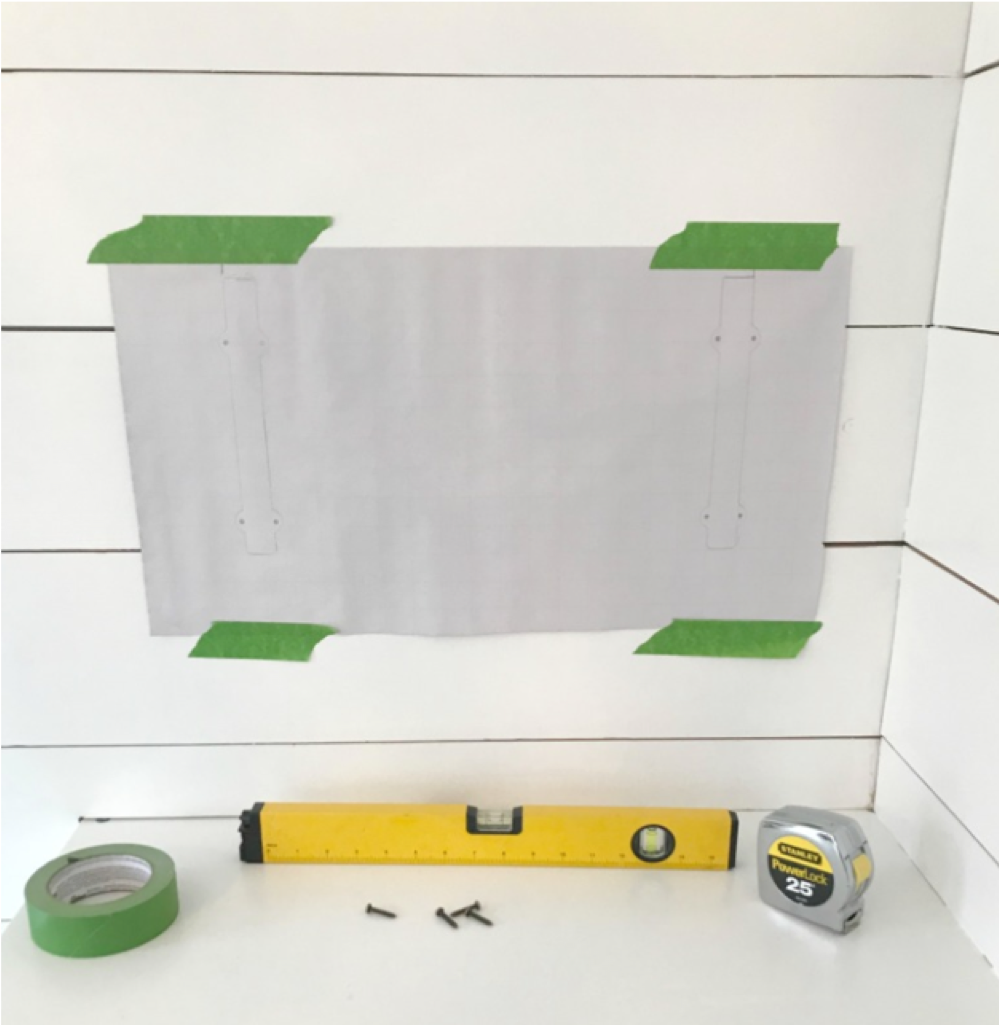
Step 5: Draw Out Your Bracket Template on Marked Wrapping Paper
Wrapping paper is good for more than just wrapping presents! The graphed back is excellent for creating templates. The marks on the back are one square inch each, making it easy to measure as well. With that being said, draw out how you would like your shelf brackets to line up on the wall. Measure the distance you prefer and then trace around each of the brackets accordingly.
Step 6: Drill and Hang Brackets
Using your drill and the right bit size, drill right through the wrapping paper where you have indicated the spot you want your shelving to hang. Make sure you do this as steady as you can, and that you are taking the necessary safety precautions to avoid injury, especially if you are on a ladder.
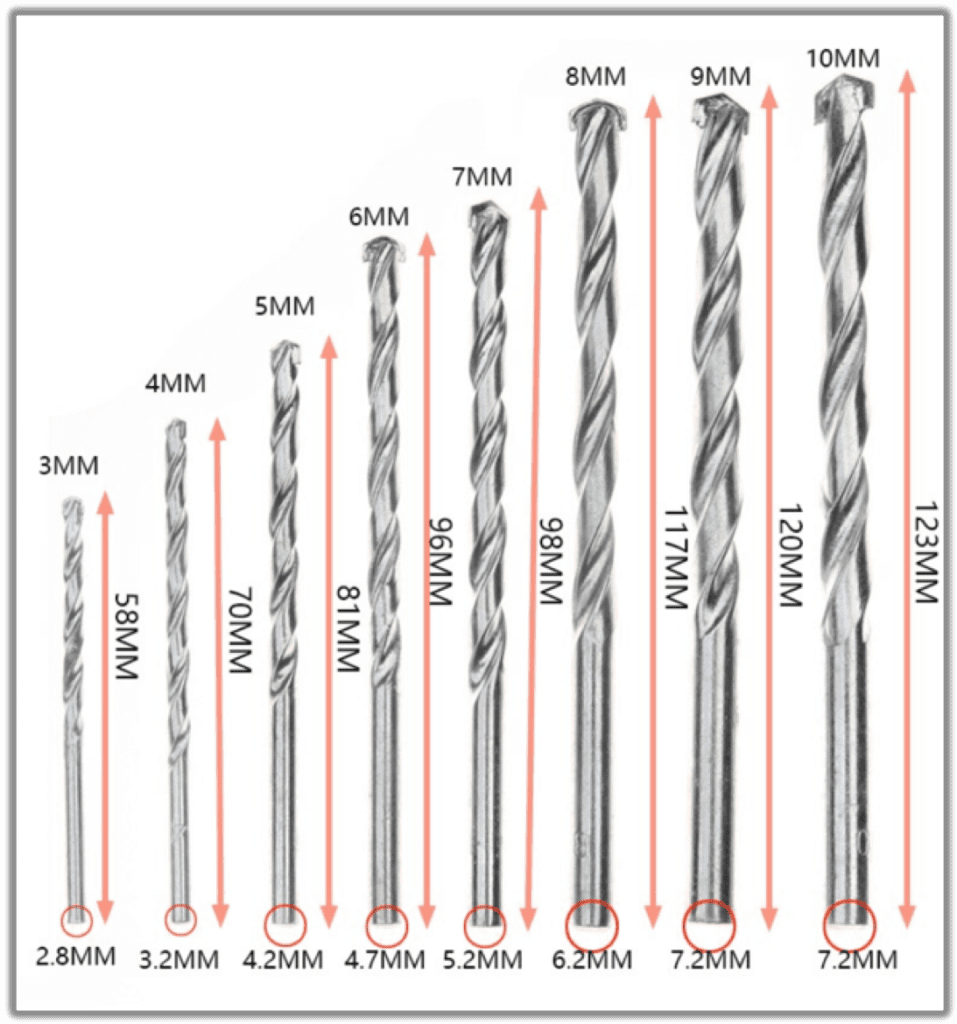
Pro Tip: If you are not sure what bit size to use, you can either read the instructions on the bracket label to see if it lists it there, or you can hold the hardware screw that you are planning to use against the bits. When you find one that is a tad smaller than the screw, that is your guy. Start smaller than you think you’ll need; it’s easy to make a bigger hole, much harder to go smaller.
Step 7: Set the Dried Wood on the Brackets, and Secure Them
Last but not least, take your boards and place them on your brackets. If they fit and meet your expectations, go ahead and secure them in place with screws. Now all you have to do is fill it up with your favorite décor, pat yourself on the back, and enjoy!
That’s is – Enjoy the new shelves!
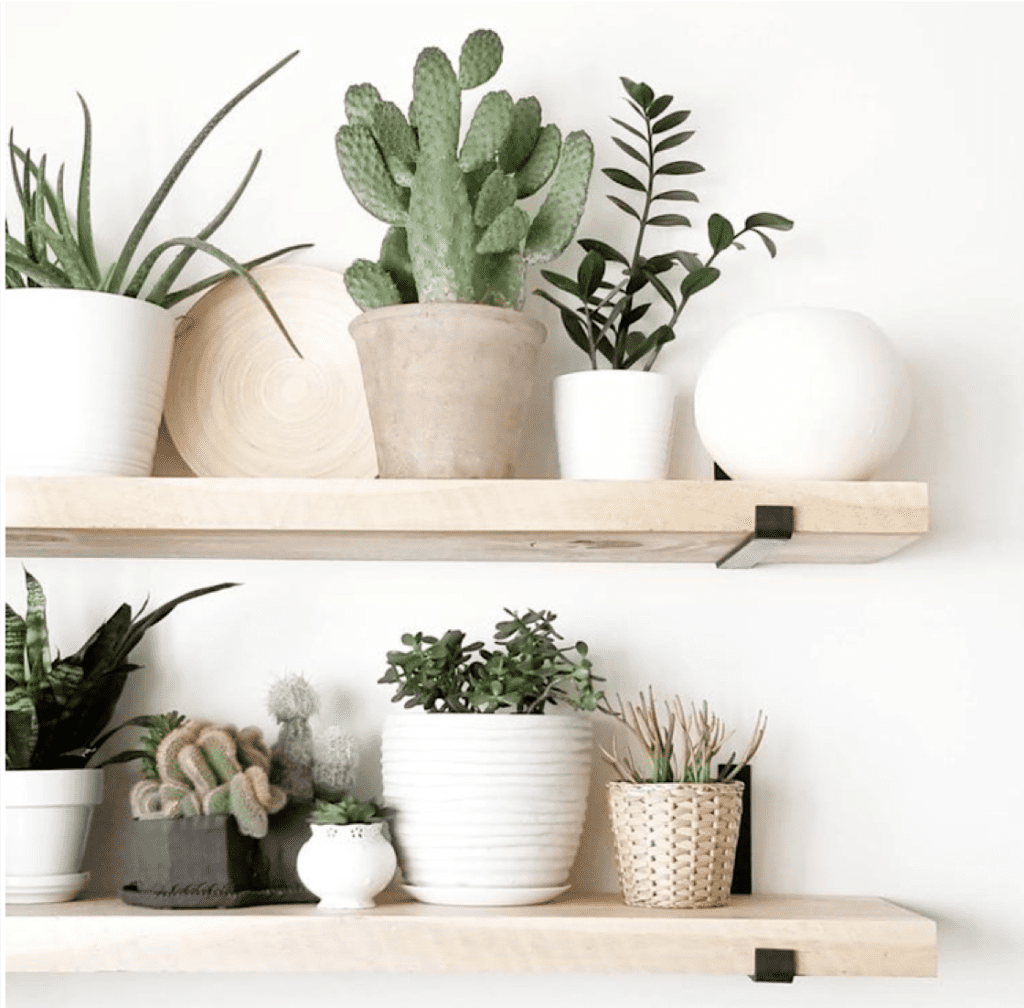
Once you have completed the DIY step by step, go ahead and admire what you just made! Fill it with items that are meaningful to you, and dig out your favorite decorations that have been tucked away in the corners of your cabinets/closets. In the end, whatever room you decide to install your shelving in will surely appear much more open, bright, and overall inspiring, truly transforming your space into something uniquely yours.